Ask questions and chat about this page directly in ChatGPT
TABLE OF CONTENTS
Intro
Whether you are a coder or a graphic designer, you probably like animation. In this short guide, I’ll show you how to quickly use ChatGPT (or any other LLM) to generate concept art of a simple fantasy side scroller, where you control a knight. The only thing you need is access to the Internet and a little bit of imagination.
Playable Game Example
Image Preparations
ChatGPT Prompt
We need to create our character first. I asked ChatGPT to generate a simple pixel art of a knight. Each row would correspond to a different animation (walk, jump, attack, defend – unused), whereas each cell of our sprite would correspond to a different frame of our character’s animation. Imagine this as a picture 4×4, where each cell is a different part of the whole animation. Meaning our character would have 4 different frames for each action.
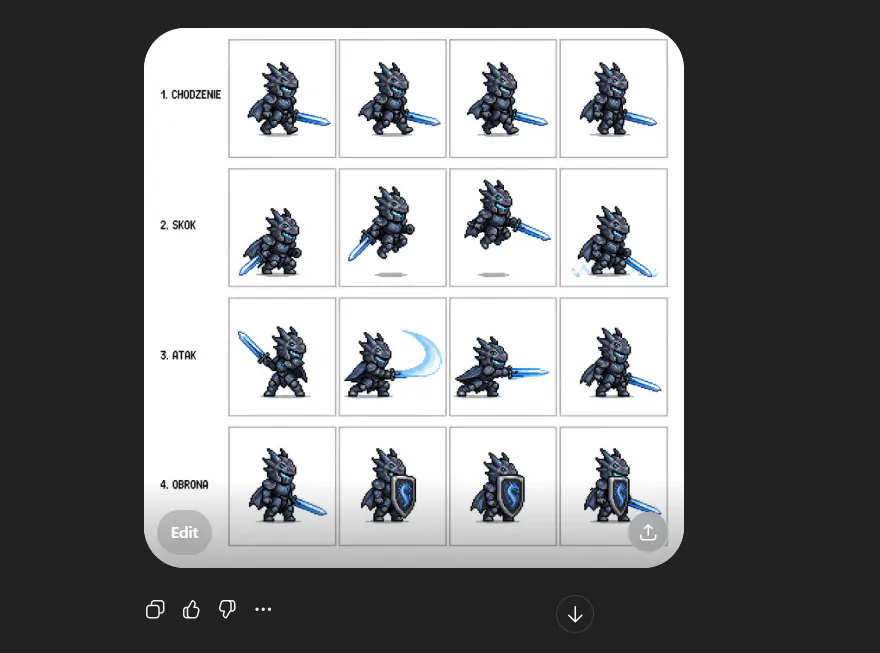
ChatGPT Knight animation sprite, first iteration
To be honest, the result was way better than I anticipated. I got a near-perfect 4×4 frame of a lovely Dragon Knight. I had to get right to the text, the frames, crop the image a little bit, and remove the white background. In the end, we want to use that sprite for our animation, and having it cleaned up up-front would make our work with the image easier.
Gimp Image alteration
To do so, I used GIMP, a free image maniuplation sofware.

With the power of GIMP, I managed to clean up the sprite quite quickly
Animating the character
Now then, I asked ChatGPT to set me up with an example animation. The LLM understood the Prompt quite quickly and set me up with a working code. I proposed to control the character with a rather standard WASD type of control, with E serving as our attack trigger.

ChatGPT provided me with a nearly perfect code, ready to copy & paste with minor alterations
The code was nearly perfect and ready to use. I had to tweak the sprite.src source with the correct file name of our knight sprite – in my case, rycerz.png. Alter the canvas height (which was too small) and adjust the FRAME_ constants. Each cell of our animation is slightly higher and takes around 215 pixels. I got those values from GIMP.
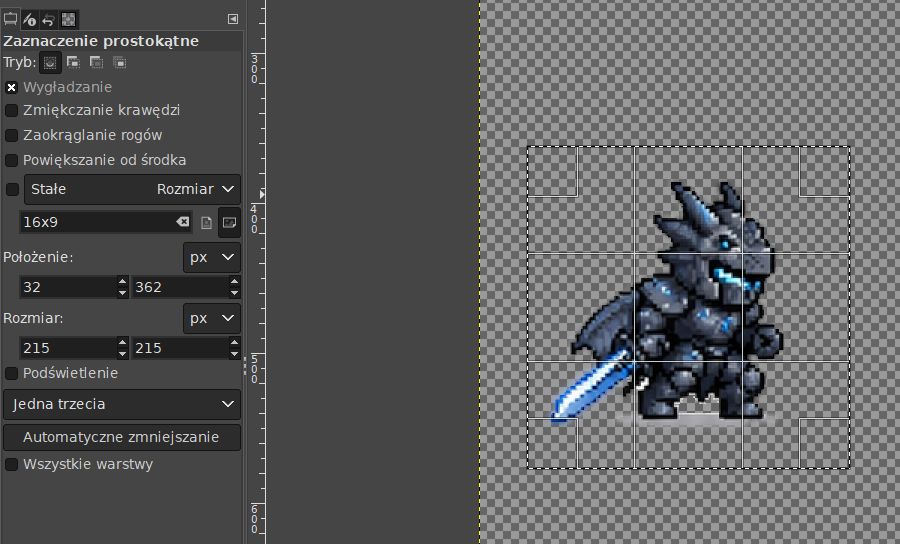
Selecting a frame with GIMP gives you a precise value of each frame’s size
With those tweaks, we had a fully functional and moving character – who was placed within a canvas.
Setting up a parallax background
Our fantasy Knight needs some sort of fascinating environment. In the end, his moving on a blank canvas wouldn’t make much sense, wouldn’t it? Henceforth, I asked ChatGPT to provide me with a stylish pixel art background on which our Knight would move.

It took me two iterations to come up with a perfect background. Needless to say, that one was pretty good.
With our character and background ready, I decided to combine the two. Again, I asked ChatGPT for help. This time around, the code was a little bit more complex to understand, but then again, it worked like a charm, as the AI assistant was pretty clear on what to put and where. In short, this code moves the image around, printing only parts of it. If the image goes outside of the viewport, it’s duplicated next. This way, we won’t end up on an empty screen.

This part of code was a bit more complex, but ChatGPT provide me with a clear instructions on what to place and where.
With the whole code combined into one, I followed ChatGPT’s instructions and ended up with a movable character having a simple jumping and attacking animation. Feel free to test the game down below.
Play the game
Use WAD to move the character around, press E to trigger the attack animation.
Full ChatGPT Prompt and follow up games
Instead of placing all of the code samples under this tutorial, feel free to go through the full conversation with ChatGPT in here. I used both English and the Polish language to achieve that effect.
If you are looking for more details on how to set up a similar game yourself, feel free to take a look at the two other tutorials, where I covered the whole process in more detail. Included are tricks on how to embed that kind of creation within a WordPress shortcode, how to add score, music, timer, and touch controls.
Bunny vs Ghosts Side Scroller
Dodge and Shoot – a Galaga clone
Summary & Next Steps
In this tutorial, we walked through how to quickly prototype a 2D fantasy side-scroller concept using ChatGPT—from visuals to gameplay logic.
We started by generating a pixel-art sprite sheet for a dragon-themed knight, complete with multiple animation states:
- walking
- jumping
- attacking
- defending
From there, we implemented a simple JavaScript game loop using HTML5 Canvas, handling:
- player movement (A / D)
- jumping physics (W)
- attack actions (E)
- sprite animation playback
We then refined the system to support real-world sprite sheets, including:
- frame spacing
- padding (borders)
- accurate frame extraction
Next, we added a parallax background system, giving the scene depth by:
- moving the background opposite to player movement
- implementing looping
- supporting pixel-perfect rendering without distortion
We also explored different rendering techniques:
- cover scaling (fills screen, may crop)
- letterbox / crop rendering (no scaling, pixel-perfect)
Finally, we generated a complete visual identity for the project:
- fantasy pixel-art backgrounds
- symmetrical environment assets
- a polished blog thumbnail combining all elements
Why This Matters
This workflow shows how you can go from idea → assets → playable prototype incredibly fast using AI tools.
Instead of spending hours switching between tools, you can:
- generate assets
- write logic
- iterate on design
—all in one place.
What You Can Try Next
If you want to take this further, here are some great next steps:
Gameplay
- Add enemies with basic AI
- Implement hit detection & health system
- Create combo attacks or cooldowns
World Building
- Introduce a tile-based ground system
- Add collision detection with terrain
- Expand into a scrolling level
Camera & Feel
- Replace player movement with a camera system
- Add screen shake on attacks
- Improve jump physics (acceleration, coyote time)
Visual Polish
- Add multiple parallax layers (sky, mountains, trees)
- Implement lighting or day/night cycles
- Add particle effects (dust, sparks, magic)
Tech Improvements
- Convert to a game framework (e.g. Phaser.js)
- Add sprite atlases & animation managers
- Optimize for mobile or responsive screens
Final Thought
You don’t need a full game engine or a big team to start building games anymore.
With the right prompts and a bit of curiosity, you can:
design, code, and prototype a game idea in a single session
So open up your editor, tweak what we built, break it, improve it—and most importantly: start creating your own world!