Ask questions and chat about this page directly in ChatGPT
TABLE OF CONTENTS
Intro
In the previous tutorial, I covered the basics of creating a custom yet simple Elementor widget. In this part of the series, I'll cover more advanced topics on extending our Elementor custom widget, that is:
- Adding controls to the Style section (which will allow a dynamic preview of the changes)
- changing the colors of the text
- altering the layout of the wrapper (flex row or column)
- modifying the width and margin of the elements
- Adding dynamic (conditional) controls
- display different control depending on the choice of a former control
- We will load custom, default scripts and styles, associated with our Widget
After the tutorial, the widget will have the Style section available and will have the following controls:
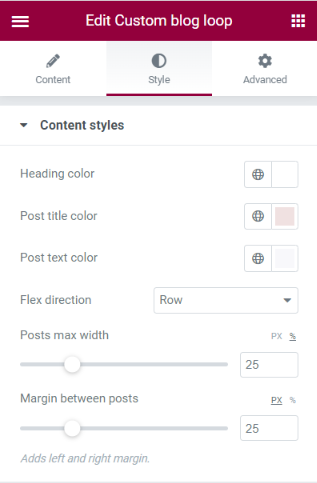
Elementor Widget Styles
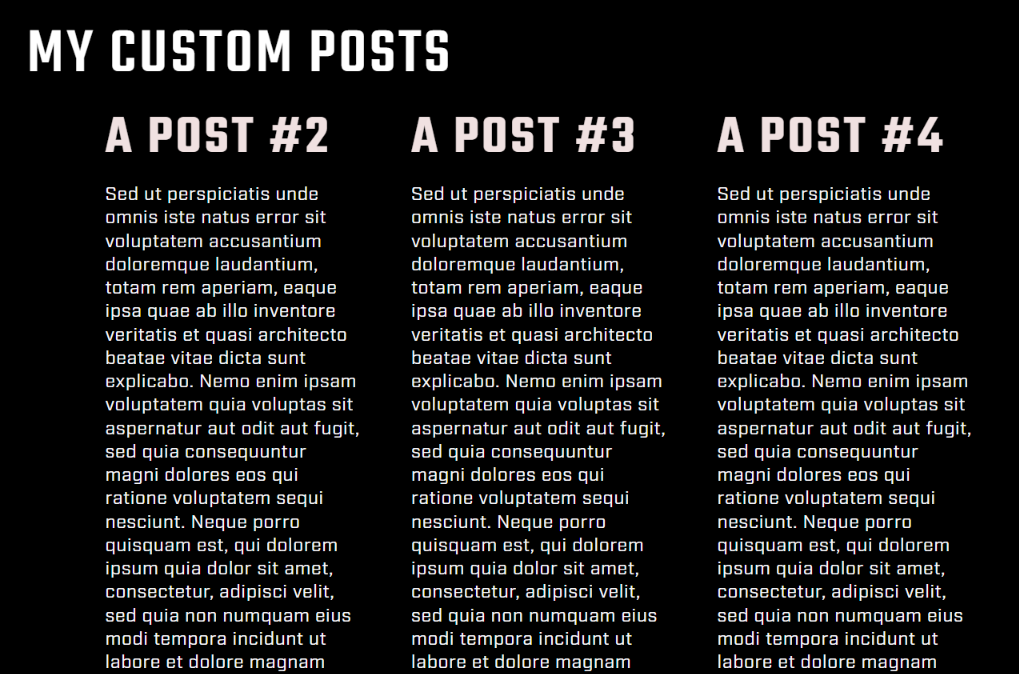
The widget display will be controllable, giving an ability to alter it's looks, for instance:
CUSTOM POST ROW LAYOUT

CUSTOM POSTS COLUMN LAYOUT
Now then, let's head to the code directly. I will neither cover the previous code, nor will I explain it, here. Feel free to see the last tutorial for a more in-depth explanation of the code. Similarly to the previous article, I've commented on the code directly instead of going through each part of the code in a separate paragraph.
Final Elementor Custom Widget PHP code
Style code
The styles are pretty simple here. We're forcing the container to flex, imposing a max-width onto it. Each element has a default max-width set, to avoid overflow. These, however, are altered by the inline code edits we've introduced under the controls of the widget, as Elementor adds inline code associated with controls selected. Bear that in mind if you were confused.
Script code
In case, we wanted to load extra JavaScript to add some dynamic elements to our code, here's a sample script, which depends on the jQuery library.
Directory / Code structure

Custom Elementor Widget Code Structure
Upon completing the tutorial your widget's directory should look as above. Remember, that we have to load the widget-custom-blog-loop.php file from functions.php file, which I covered in the first tutorial.
Let me know in the comments below if you need any help or extra explanation regarding this part of the tutorial. I’ll be more than happy to offer my support here.
Resources
- https://wp-doin.com/creating-a-custom-an-functional-elementor-widget-part-1/ - Part 1 of the Series
- https://elementor.github.io/elementor-icons/ - Elementor Icons to choose from, used the get_icon method
- https://developers.elementor.com/docs/widgets/widget-data/ - Base information of the Widget structure
- https://developers.elementor.com/docs/controls/ - Elementor Controls documentation