Echo Assistant is available throughout the tutorial-just select any text and click “Ask Echo” to get more detailed information on the topic.
Contact Form 7 stands out as one of the most widely adopted WordPress contact form plugins, celebrated for its user-friendly interface, configurability, and, notably, its free availability. However, when juxtaposed with premium alternatives like Gravity Forms, Contact Form 7 does come with a somewhat restricted set of features. While its simplicity and cost-effectiveness make it a popular choice, users may occasionally find themselves yearning for additional customization options.
In this guide, I will walk you through a straightforward process to elevate the visual appeal and functionality of your Contact Form 7 by seamlessly incorporating a two-column layout. At the top you’ll see a video tutorial, at the bottom you’ll see a written tutorial.
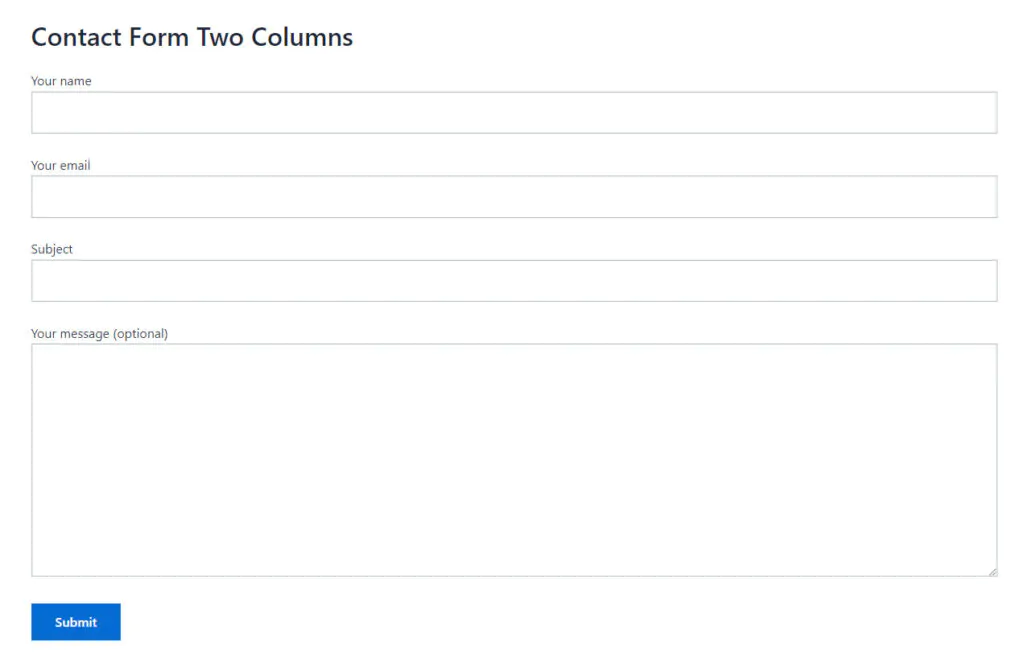
Default Contact Form 7 Layout
The default one-column layout in Contact Form 7 provides a straightforward and vertically aligned structure for displaying form fields. In this layout, each form element, such as name, email, message, etc., is typically presented one below the other, creating a clean and easy-to-follow design.
Contact Form 7 Default Layout
Adding Two Columns to Contact Form 7
Contact Form 7 forms are typically constructed using HTML and shortcodes. To implement a two-column layout, we’ll use HTML structure within the form editor.
Step 1: Accessing the Contact Form 7 Editor
Navigate to the WordPress admin dashboard.
Click on “Contact” in the left-hand menu to access Contact Form 7 forms.
Select the form you wish to modify.
Add the following HTML markup to your form.
Step 2: Adding custom CSS to your Theme
Place, the following .css code within your theme Customizer -> Additional CSS or use any other different method for custom theme .css.
Step 3: Save and Preview
After implementing the changes, save your form, and preview it to ensure that the two-column layout is applied successfully. The default contact form undergoes a transformation, presenting an aesthetically refined and structurally enhanced appearance. Here’s a detailed portrayal of how the form evolves:
Contact Form 7 Final Layout
By following this user-friendly guide, you can seamlessly introduce a two-column layout to your Contact Form 7 without delving into complex coding or investing in premium plugins. This simple yet effective customization enhances the visual appeal and organization of your forms, contributing to an improved user experience for your website visitors.
Example
Here’s an example of a Contact Form 7 form with custom styles applied on top of the default styling using the aforementioned technique. By building upon the plugin’s existing styles rather than replacing them entirely, you can maintain compatibility and functionality while achieving a more polished and customized appearance that better matches your website’s design.
Video Tutorial
If you’d like a more detailed walkthrough, be sure to check out the accompanying video tutorial, where each step is explained in depth. The tutorial covers the complete styling process, demonstrates practical examples, and provides additional tips to help you customize Contact Form 7 forms more effectively and efficiently.
Alternative to Contact Form 7 👇
If you’re looking for a more robust and user-friendly alternative with advanced features and greater flexibility, consider trying Gravity Forms instead. It offers a powerful drag-and-drop form builder, advanced conditional logic, built-in integrations with popular marketing and CRM platforms, payment processing support, and extensive customization options — making it an excellent choice for businesses and websites that require more than just a basic contact form solution.
Thanks for this guide! I was looking for a way to make my contact form look better, and your instructions were easy to follow. The two-column layout really improves the appearance of the form. Appreciate the clear steps and the helpful video!
By browsing through the site and filling in the Contact Forms you agree to our PRIVACY POLICY. Moreover WP doin website uses COOKIES to improve your experience. We assume you're ok with this, but you can opt-out if you wish. ACCEPTREJECTCookie settings
Privacy & Cookies Policy
Privacy Overview
This website uses cookies to improve your experience while you navigate through the website. Out of these, the cookies that are categorized as necessary are stored on your browser as they are essential for the working of basic functionalities of the website. We also use third-party cookies that help us analyze and understand how you use this website. These cookies will be stored in your browser only with your consent. You also have the option to opt-out of these cookies. But opting out of some of these cookies may affect your browsing experience.
Necessary cookies are absolutely essential for the website to function properly. This category only includes cookies that ensures basic functionalities and security features of the website. These cookies do not store any personal information.
Cookie
Duration
Description
cookielawinfo-checkbox-advertisement
1 year
Set by the GDPR Cookie Consent plugin, this cookie records the user consent for the cookies in the "Advertisement" category.
cookielawinfo-checkbox-analytics
1 year
Set by the GDPR Cookie Consent plugin, this cookie records the user consent for the cookies in the "Analytics" category.
cookielawinfo-checkbox-functional
1 year
The GDPR Cookie Consent plugin sets the cookie to record the user consent for the cookies in the category "Functional".
cookielawinfo-checkbox-necessary
1 year
Set by the GDPR Cookie Consent plugin, this cookie records the user consent for the cookies in the "Necessary" category.
cookielawinfo-checkbox-others
1 year
Set by the GDPR Cookie Consent plugin, this cookie stores user consent for cookies in the category "Others".
cookielawinfo-checkbox-performance
1 year
Set by the GDPR Cookie Consent plugin, this cookie stores the user consent for cookies in the category "Performance".
CookieLawInfoConsent
1 year
CookieYes sets this cookie to record the default button state of the corresponding category and the status of CCPA. It works only in coordination with the primary cookie.
Functional cookies help to perform certain functionalities like sharing the content of the website on social media platforms, collect feedbacks, and other third-party features.
Cookie
Duration
Description
__cf_bm
30 minutes
Cloudflare set the cookie to support Cloudflare Bot Management.
aet-dismiss
never
Disqus sets this cookie for the functionality of the website’s comment system.
badges-message
never
Disqus sets this cookie for the functionality of the website’s comment system.
drafts.queue
never
Disqus sets this cookie for the functionality of the website’s comment system.
submitted_posts_cache
never
Disqus sets this cookie for the functionality of the website’s comment system.
Performance cookies are used to understand and analyze the key performance indexes of the website which helps in delivering a better user experience for the visitors.
Cookie
Duration
Description
__jid
30 minutes
Disqus sets this cookie to remember the user's Disqus login credentials across websites that use Disqus.
Analytical cookies are used to understand how visitors interact with the website. These cookies help provide information on metrics the number of visitors, bounce rate, traffic source, etc.
Cookie
Duration
Description
__gads
1 year 24 days
Google sets this cookie under the DoubleClick domain, tracks the number of times users see an advert, measures the campaign's success, and calculates its revenue. This cookie can only be read from the domain they are currently on and will not track any data while they are browsing other sites.
_ga
1 year 1 month 4 days
Google Analytics sets this cookie to calculate visitor, session and campaign data and track site usage for the site's analytics report. The cookie stores information anonymously and assigns a randomly generated number to recognise unique visitors.
_ga_*
1 year 1 month 4 days
Google Analytics sets this cookie to store and count page views.
_gh_sess
session
GitHub sets this cookie for temporary application and framework state between pages like what step the user is on in a multiple step form.
brwsr
1 year 1 month 4 days
This cookie is set by the provider Impact Radius. This cookie is used for affiliate marketing.
CONSENT
2 years
YouTube sets this cookie via embedded YouTube videos and registers anonymous statistical data.
disqus_unique
1 year
Set to record internal statistics for anonymous visitors.
Advertisement cookies are used to provide visitors with relevant ads and marketing campaigns. These cookies track visitors across websites and collect information to provide customized ads.
Cookie
Duration
Description
__gpi
1 year 24 days
Google Ads Service uses this cookie to collect information about from multiple websites for retargeting ads.
DSID
1 hour
This cookie is set by DoubleClick to note the user's specific user identity. It contains a hashed/encrypted unique ID.
IDE
1 year 24 days
Google DoubleClick IDE cookies store information about how the user uses the website to present them with relevant ads according to the user profile.
test_cookie
15 minutes
doubleclick.net sets this cookie to determine if the user's browser supports cookies.
VISITOR_INFO1_LIVE
5 months 27 days
YouTube sets this cookie to measure bandwidth, determining whether the user gets the new or old player interface.
YSC
session
Youtube sets this cookie to track the views of embedded videos on Youtube pages.
yt-remote-connected-devices
never
YouTube sets this cookie to store the user's video preferences using embedded YouTube videos.
yt-remote-device-id
never
YouTube sets this cookie to store the user's video preferences using embedded YouTube videos.
yt.innertube::nextId
never
YouTube sets this cookie to register a unique ID to store data on what videos from YouTube the user has seen.
yt.innertube::requests
never
YouTube sets this cookie to register a unique ID to store data on what videos from YouTube the user has seen.


Thanks for this guide! I was looking for a way to make my contact form look better, and your instructions were easy to follow. The two-column layout really improves the appearance of the form. Appreciate the clear steps and the helpful video!
Hey, thanks for a 3rd comment in a row today 🙂 Happy to know that you found my work useful.
Regards 🙂